
When you sign in to the Pictue mobile app, it opens to the Map View.
Capturing Images
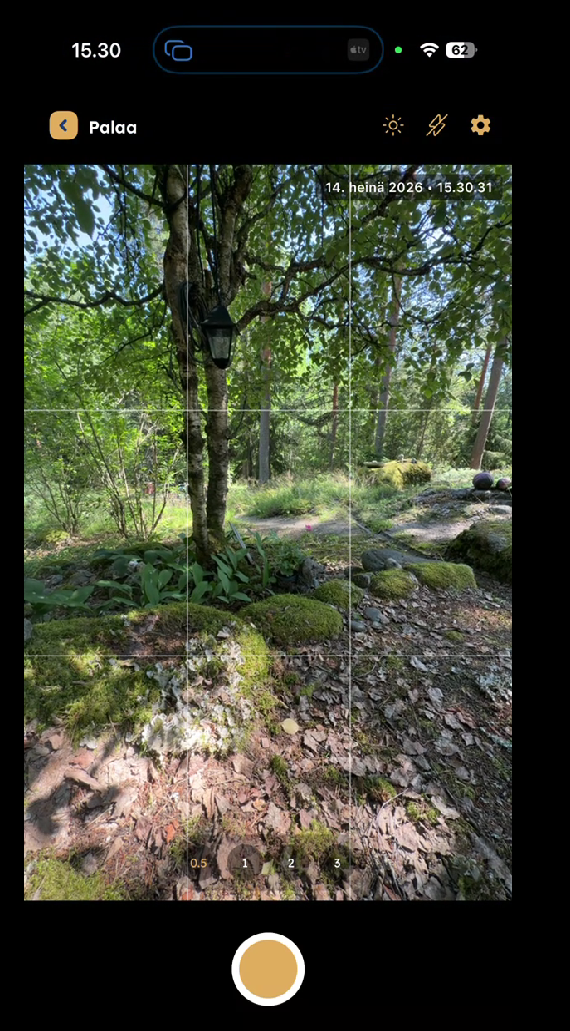
Open the camera by tapping the camera icon at the bottom of the map.
Take a photo by pressing the capture button at the bottom of the camera screen.
You can capture up to 150 images in a single session. Each image is automatically tagged with its GPS location at the moment it is taken.
From the camera screen, you can:
- Use the flash in Auto, On, or Off mode.
- Adjust the image brightness.
- Preview the most recently captured image.
- See how many images have been captured.
- Review and delete images before continuing.
From the Settings menu, you can also:
- Select which camera to use.
- Add a timestamp to images.
- Add GPS coordinates to images.
- Enable a camera grid.
When you've finished capturing images, tap Continue.


Adding Keywords
Select a Keyword Path for the images or copy the selections used during your previous capture session.
A Keyword Path can include information such as:
- Project or site
- Work location or work phase
- Image Status
- Comments
If the required project or Keyword doesn't exist, you can create a new one by tapping Create New Keyword.
This feature is available only if your organisation has enabled mobile Keyword creation. Newly created Keywords become available to all users in your organisation.


Uploading Images
After uploading your images, the app returns to the Map View and automatically zooms to the location where the images were captured so you can immediately verify their position.
If you don't have an internet connection, your images are safely stored on your device and uploaded automatically once the connection is restored. You can even close the app—your images will remain safely queued for upload.

Fallback Mode
If your organisation hasn't created any Keyword Paths, tapping Continue opens the Fallback screen instead.
From there, you can freely choose from all available Keywords and Keyword List items in your organisation. These selections are stored with your images, allowing them to be easily filtered later in both the Gallery and Map View.
After completing either the Fallback workflow or the Keyword Path, you can add an optional comment containing additional information.
Finally, tap Upload Images.
The app returns to the Map View, where you'll see an "X images uploading" indicator at the top of the screen.
Once the upload has finished, the map automatically zooms to your location, and the new image markers appear on the map. Your images are immediately available from both the Map View and the Gallery.
Photos are stored locally in the mobile device immediately after they are taken. However, they are only uploaded to the cloud and made available to other users after you press the "Upload Photos" button.
If your internet connection is poor, you do not need to wait for the upload to finish. You can simply close the app or lock your phone. The next time you open Pictue with a better connection, the photos will still be queued for upload. You can continue uploading them either by tapping "Upload Photos" at the top of the map view or by uploading them individually from the gallery.
If a photo is taking a long time to upload and you need it immediately, you can save it from the Pictue gallery to your mobile device's storage. You can also share photos that have not yet been uploaded to the cloud directly from the gallery to other apps, such as WhatsApp or email.


